Developer Prerequisites
The following mandatory pre-requisites must be completed to set up a development environment for Bevel.
The process of setting up developer pre-requisites can be done manually or via an automation script.
Script Based Setup
You can use the scripts here to setup developer prerequisites for Windows or Mac systems.
NOTE: You need to run the script with admin rights. This can be done by right clicking the script and selecting ‘Run as admininstrator’.
Manual Setup
The estimated total effort is 55 mins.
NOTE: You will need at least 16GB RAM to run Bevel on local machine.
Setting up Git on your machine
Estimated Time: 10 minutes
To use Git, you need to install the software on your local machine.
Download and install git bash from http://git-scm.com/downloads.
Open ‘git bash’ (For Windows, Start > Run,
C:\Program Files (x86)\Git\bin\sh.exe --login -i)After the install has completed you can test whether Git has installed correctly by running the command
git --versionIf this works successfully you will need to configure your Git instance by specifying your username and email address. This is done with the following two commands (Use your GitHub username and email address, if you already have a Github Account):
git config --global user.name "<username>"
git config --global user.email "<useremail>"
To verify that the username and password was entered correctly, check by running
git config user.name
git config user.email
Windows users should additionally execute the following so that the EOLs are not updated to Windows CRLF.
git config --global core.autocrlf false
Setting up Github
Estimated Time: 5 minutes
GitHub is a web-based Git repository hosting service. It offers all of the distributed revision control and source code management (SCM) functionality of Git as well as adding its own features. You can create projects and repositories for you and your teams’ need.
Complete the following steps to download and configure Bevel repository on your local machine.
If you already have an account from previously, you can use the same account. If you don’t have an account, create one.
Go to bevel on GitHub and click Fork button on top right. This will create a copy of the repo to your own GitHub account.
Create a
projectdirectory in your home directory and clone the forked repository to your local machine.mkdir project cd project git clone https://github.com/<username>/bevel.git
Checkout the develop branch.
cd bevel
git checkout develop
NOTE: If you have 2-Factor Authentication enabled on your GitHub account, you have to use GitHub token. Otherwise, password is fine.
How To Generate GitHub Token
On GitHub page, click your profile icon and then click Settings.
On the sidebar, click Developer settings.
On the sidebar, click Personal access tokens.
Click Generate new token.
Add a token description, enable suitable access and click Generate token.
Copy the token to a secure location or password management app.
For security reasons, after you leave the page, you can no longer see the token again.
Setting up Docker
Estimated Time: 10 minutes
Install Docker CLI for Windows or Mac to make sure your local environment has the capability to execute docker commands.
You can check the version of Docker you have installed with the following
command from a terminal prompt:
docker --version
Setting up HashiCorp Vault
Estimated Time: 15 minutes
We need Hashicorp Vault for the certificate and key storage.
To install the precompiled binary, download the appropriate package for your system.
Once the zip is downloaded, unzip it into any directory. The
vaultbinary inside is all that is necessary to run Vault (orvault.exefor Windows). Any additional files, if any, aren’t required to run Vault.Create a directory
project/binand copy the binary there. Addproject/bindirectory to yourPATH. Run following from git bash.mkdir project/bin mv vault.exe project/bin export PATH=./project/bin:$PATH
Create a
config.hclfile in theprojectdirectory with the following contents (use a file path in thepathattribute which exists on your local machine)ui = true storage "file" { path = "./project/data" } listener "tcp" { address = "0.0.0.0:8200" tls_disable = 1 }
Start the Vault server by executing (this will occupy one terminal). Do not close this terminal.
vault server -config=config.hcl
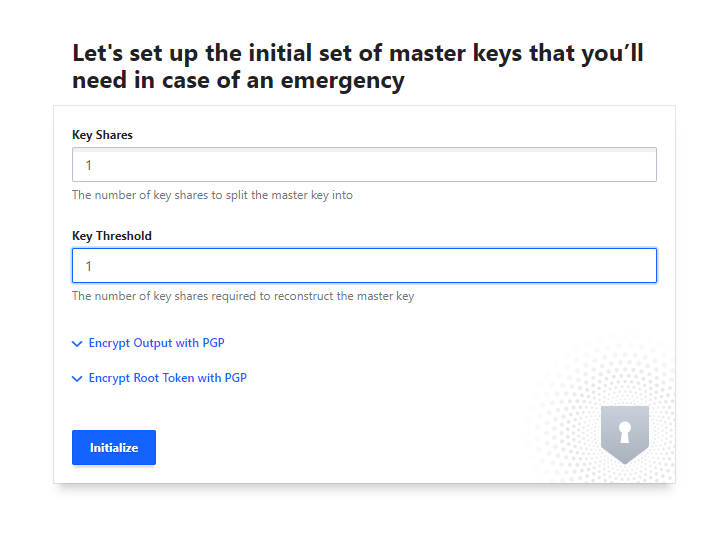
Open browser at http://localhost:8200/. And initialize the Vault by providing your choice of key shares and threshold. (below example uses 1)
Click Download Keys or copy the keys, you will need them. Then click Continue to Unseal. Provide the unseal key first and then the root token to login.
If you need to restart Vault, use the saved unseal keys and root token.
Setting up Minikube
Estimated Time: 15 minutes
For development environment, minikube can be used as the Kubernetes cluster on which the DLT network will be deployed.
Follow platform specific instructions to install minikube on your local machine. Also, for Windows install Virtualbox as the Hypervisor. For Mac, install hyperkit by
brew install hyperkit(If you already have HyperV it should be removed or disabled.)Minikube is also a binary, so move it into your
./project/bindirectory as it is already added toPATH.Configure minikube to use 4GB memory and default kubernetes version
minikube config set memory 4096
minikube config set kubernetes-version v1.23.1
Then start minikube. This will take longer the first time.
minikube start --vm-driver=virtualbox #for Windows
minikube start --vm-driver=hyperkit #for Mac
Check status of minikube by running
minikube statusThe Kubernetes config file is generated at
~/.kube/configTo stop (do not delete) minikube execute the following
minikube stopNow your development environment is ready!
NOTE: Minikube uses port in range 30000-32767. If you would like to change it, use the following command:
minikube start --vm-driver=virtualbox --extra-config=apiserver.service-node-port-range=15000-20000
Troubleshooting
At Step 5, if you get the following error:
2020-03-10T17:00:21.664Z [ERROR] core: failed to initialize barrier: error="failed to persist keyring: mkdir /project: permission denied"
Update the path in Vault config.hcl to absolute path:
storage "file" {
   path    = "/full/path/to/project/vault"
}
For example, /home/users/Desktop/project/vault.